How to Spot a True Pet Emergency in Seconds
Pet Emergency? Here’s Exactly What to Do Right Now
When your dog suddenly collapses after eating something toxic, a pet emergency demands immediate recognition of the symptoms and swift action. A pet emergency is any sudden, life-threatening condition—such as choking, severe bleeding, or poisoning—that requires urgent veterinary care. The benefit of understanding pet emergency protocols is that you can stabilize your pet during transport by keeping them warm, minimizing movement, and calling ahead to the clinic. To use this knowledge, first check breathing and pulse, then apply direct pressure to wounds, and proceed directly to the nearest open veterinary hospital. Immediate response time is the single most critical factor in saving an animal’s life during a crisis.
How to Spot a True Pet Emergency in Seconds

In a pet emergency, seconds matter, so prioritize the ABCs: airway, breathing, and circulation. If your pet is unconscious, has blue or pale gums, or is not breathing, that’s an immediate red flag requiring CPR and transport. Check for a visible, severe bleed that soaks a towel rapidly, or a fracture where the bone protrudes—both are critical. Watch for toxic ingestion of chocolate, xylitol, or rat poison, especially if vomiting or tremors occur. Seizures lasting over two minutes, or repeated back-to-back, are a true emergency. Inability to urinate, especially in male cats, or a bloated, distended abdomen with retching signal obstruction or GDV. If the animal cannot stand or shows sudden paralysis, do not wait—these are time-sensitive crises where immediate veterinary intervention directly impacts survival.
Recognizing the Silent Signs That Require Immediate Action
Some emergencies hide behind stillness. A pet that suddenly stops grooming, refuses eye contact, or flinches from gentle touch is signaling pain—not stubbornness. Rapid, shallow breathing while resting, pale gums, or a sudden drop in energy that lasts over an hour demand immediate veterinary intervention. Likewise, vomiting that occurs twice within 30 minutes, straining to urinate without producing, or a distended, hard abdomen are silent crises. Do not wait for yelping or collapse; these quiet shifts often precede shock, bloat, or organ failure. If your gut whispers that something is off, act on that instinct now—seconds count when signs are subtle.
| Silent Sign | Why It’s Urgent | Action Window |
|---|---|---|
| Hidden posture (hunched, tucked tail) | Suggests abdominal or spinal pain | Within 30 minutes |
| Lips pulled back without panting | Pain grimace, not a smile | Immediately |
| Excessive drooling with no nausea trigger | Possible toxin or esophageal blockage | Within 15 minutes |
When to Call the Vet vs. When to Rush to the ER
Call your vet for non-progressive issues like a single vomit, mild diarrhea, or a small cut that’s stopped bleeding—these can often wait for a same-day appointment. Rush to the ER the moment you see true pet emergency signs: uncontrolled bleeding, difficulty breathing, seizures, collapse, or a bloated, painful abdomen. Time is tissue; if your pet’s condition worsens in under 30 minutes or they refuse to stand, skip the phone call and drive. Follow this sequence: (1) assess consciousness and breathing, (2) check for pale gums or rapid pulse, (3) note any poisoning or trauma, (4) if any red flag appears, go immediately—do not wait for clinic hours.
The 10-Minute Checklist for Assessing Your Pet’s Condition
When every second counts, a structured 10-minute emergency pet assessment prevents panic-driven errors. Begin with responsiveness: call your pet’s name and gently touch them; no reaction signals a critical issue. Next, check breathing—count chest movements for 30 seconds, noting any labored or absent effort. Then, examine mucous membranes: pale, blue, or brick-red gums indicate oxygenation or circulation failure. Finally, feel for a pulse on the inner thigh; a weak or racing heartbeat demands immediate veterinary action. Do not repeat steps; if any finding is abnormal, stop the checklist and transport your pet. This systematic scan keeps you focused under stress.
- Time each step; never exceed two minutes per check.
- Use a phone timer to avoid losing track during the assessment.
- Record abnormal findings on paper to relay to the vet.
Building a Personal Pet Emergency Action Plan That Actually Works
A personal pet emergency action plan only works if it’s drilled before crisis hits. Start by mapping your home’s primary and secondary escape routes, then assign each family member a specific role—one grabs the carrier, another leashes the dog, another secures the cat’s hiding spot. Keep a pet emergency kit near the exit, stocked with a physical copy of vet records, three days of medication, and a recent photo for identification. Practice monthly drills at random times, including during nights, because panic makes pets bolt; time your evacuation and shorten it by 20 seconds each session. Also, pre-program the nearest 24-hour emergency vet’s number into your phone and write it on the kit—but never rely on memory when adrenaline is high. Finally, rehearse with your pet in a muzzle or carrier so they associate the routine with calm, not fear.

Assembling a Pet First-Aid Kit Tailored to Your Animal’s Species and Size
A first-aid kit only works if its contents match your pet’s biology and body mass. For a 5 kg cat, include a pediatric oral syringe (1–3 ml) and a single-dose antihistamine tablet, whereas a 40 kg dog needs a 10 ml syringe and multiple dose oak tree animal hospital options. Adjust bandage widths to limb diameter—vet wrap at 2.5 cm for small paws, 5 cm for large breeds—and choose a muzzle style that fits a brachycephalic face without blocking breathing. Include species-specific items like a reptile heat pad for a snake’s transport box or a bird’s止血 styptic powder, and scale splint lengths against your animal’s tibia measurement. Recheck quantities every three months, especially for weight-dependent medications, to maintain a species-specific emergency medication list that stays accurate as your pet grows.
Mapping the Fastest Route to the Nearest 24-Hour Animal Hospital Before You Need It
Before a crisis hits, program the nearest 24-hour animal hospital into your phone’s GPS and physically drive the route once, noting construction zones and left-turn bottlenecks that could add minutes. Use a dedicated map app with offline capability, since cellular data may fail during an emergency, and save a secondary hospital as a backup. Time your test drive during the same hours you’d likely travel—nighttime traffic differs drastically from daytime. Even a five-minute delay from an inaccurate address or a closed shortcut can escalate a treatable condition into a critical one. Keep a printed map with the hospital’s number in your glovebox, and verify the address matches the clinic’s official website, not just a third-party listing. Pre-mapped route verification is your fastest lifeline when every second counts.
Map and drive the route to your nearest 24-hour animal hospital now, so panic never steers you wrong later.
What Information You Must Have Ready When You Call the Emergency Line
Before dialing, keep a written or digital checklist beside your phone with your pet’s critical emergency information—age, breed, known allergies, and current medications with dosages. State the exact time symptoms began and whether the incident involved a toxin, trauma, or seizure. Have your regular veterinarian’s number, the nearest 24-hour clinic’s address, and your pet’s microchip ID ready, plus confirm your own location and callback number. Mention your pet’s weight in kilograms, as drug calculations hinge on this. If you’ve administered any first aid, say precisely what and when—do not guess. The dispatcher must know your pet’s last meal time and whether vomiting or urination occurred since the event. Keep this list laminated near the phone.
Handling Time-Sensitive Injuries: Step-by-Step First Aid for Critical Moments

When your pet suffers a time-sensitive injury—like heavy bleeding, choking, or a deep puncture—your first 60 seconds dictate survival. Stay calm, muzzle a panicked pet to prevent bites, then apply direct pressure with clean gauze for arterial bleeds; do not remove soaked cloth, just layer more on top. For choking, perform five rapid chest thrusts with the pet upright, then sweep the mouth only if you see the object. Immobilize fractures with a rolled magazine and towel before transport, and keep a collapsed pet on their right side with the head elevated. Q: What if my dog stops breathing during a seizure? A: Check for a heartbeat for 5 seconds; if absent, start CPR—30 compressions per 2 rescue breaths—and continue until veterinary hands take over. Every second lost reduces survival odds, so rehearse these steps now, not during the crisis. Wrap the pet in a blanket to reduce shock, and drive immediately to the nearest 24-hour ER—never wait for symptoms to improve on their own.
Controlling Bleeding and Stabilizing Fractures Without Causing More Harm
For bleeding, apply direct pressure with a clean cloth for at least five minutes without peeking, as lifting reveals clotting disruption. Never use a tourniquet on a pet unless a limb is severed, since improper use causes ischemia. For fractures, stabilize the limb without realigning bones—splint only if the pet allows, using a rigid support wrapped with gauze above and below the joint. Avoid bending the spine; use a rigid board for suspected neck or back injuries. Immobilize the entire area, then transport with minimal movement. Q: What is the safest way to stop arterial bleeding on a leg? A: Press a sterile pad directly on the wound with consistent firm pressure, never releasing until veterinary help arrives. Hemorrhage control fails when pressure is intermittent, so maintain it for up to fifteen minutes.
Responding to Choking, Poisoning, or Heatstroke in the First Five Minutes
The first five minutes define survival in pet emergencies. For choking, open the mouth carefully to sweep visible obstructions; if unseen, perform five sharp back blows between the shoulder blades. For poisoning, do not induce vomiting unless a vet explicitly instructs—instead, remove remaining toxin and save packaging for identification. For heatstroke, move the pet to shade, douse with cool (not icy) water over the neck, armpits, and groin, and begin fanning immediately. Rapid first-five-minute intervention prevents irreversible organ damage. Q: Should I force water into a choking pet? A: No—never force liquids during choking, as aspiration worsens airway blockage; focus on clearing the obstruction first.
Performing CPR on a Pet: The Exact Hand Placement and Compression Rates

For canine CPR, place the heel of one hand directly over the widest part of the chest, typically just behind the elbows, while the other hand reinforces the first. In cats and small dogs, compress by squeezing the chest between your thumb and forefingers placed over the sternum. Deliver compressions at a rate of 100–120 per minute, matching the rhythm of the Bee Gees’ “Stayin’ Alive.” For large dogs, compress the chest one-third to one-half its width, allowing full recoil between pushes. *Depth and rate must adapt to thoracic shape, so a barrel-chested dog requires side-lying compressions, not sternal ones.* Alternate 30 compressions with two rescue breaths, checking for a heartbeat every two minutes. Do not pause longer than ten seconds for breathing attempts.
Choosing the Right Emergency Facility for Your Pet’s Specific Condition
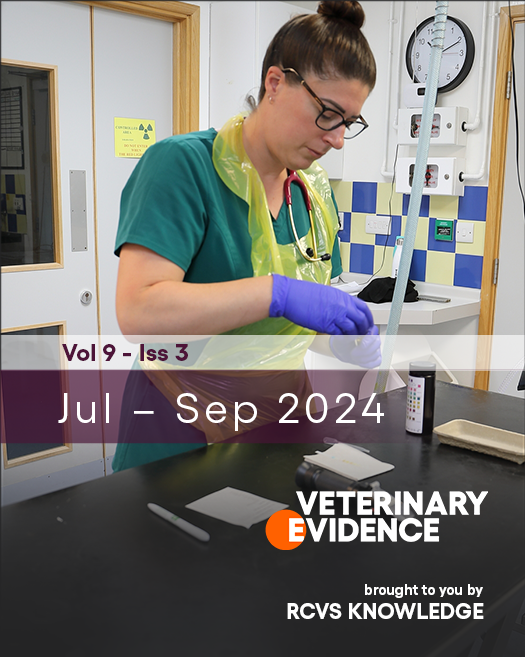
When your pet faces an emergency, the nearest clinic isn’t always the right one. First, call ahead and describe the specific condition—trauma, poisoning, or respiratory distress—to confirm they have the necessary specialized equipment like oxygen cages or a surgical suite. For neurological crises or cardiac arrest, you need a 24-hour critical care facility with a board-certified specialist on duty, not a daytime-only general practice. If your pet has a known condition like diabetes or a bleeding disorder, ask if they can monitor continuous glucose or coagulation parameters. Transferring mid-emergency is dangerous, so verify their capability before you arrive. Also, check if they have an in-house lab and imaging (ultrasound/CT) for fast diagnosis; a facility that must send out tests wastes precious minutes. Ultimately, prioritize life-saving capacity over travel time—except for severe bleeding or airway blockage, where the closest certified emergency room is your first stop.
Critical Care Capabilities: What Equipment and Staff Levels to Look For
For critical cases, verify the facility operates a dedicated intensive care unit with continuous electrocardiogram, pulse oximetry, and blood pressure monitoring. Confirm 24/7 on-site staffing by a veterinary criticalist or emergency specialist, plus registered veterinary technicians assigned per ICU patient—ideally a 1:3 or better ratio. Ask about mechanical ventilation capability, oxygen cages, and in-house blood gas analyzers for real-time metabolic assessment. A facility lacking overnight technician coverage cannot manage decompensating patients. Continuous multi-parameter monitoring with specialist oversight distinguishes a true critical care unit from a basic emergency clinic.
- Request nurse-to-patient ratios and overnight rounding protocols.
- Confirm availability of central lines, chest tubes, and infusion pumps.
- Check if a blood bank or on-site transfusion products exist.
- Ask if a criticalist reviews ICU cases daily.
Questions to Ask an Emergency Vet Before You Arrive
Before rushing out the door, call the emergency vet and ask if they can handle your pet’s specific condition—for example, do they have an on-site surgeon for a GDV or a neurologist for seizures? Confirm their current wait time and whether you can speak directly with the triage technician, not just a receptionist. Ask if they accept walk-ins or require a referral, and clarify their payment deposit policy so you aren’t blindsided. Prioritize questions about staffing ratios and monitoring capabilities—you need to know if a vet will remain with your pet overnight. Inquire about what to bring, such as prior records or medications. A facility that hesitates on concrete answers likely lacks the resources your pet needs. Finally, ask for their direct line in case you get delayed, then prepare your route.
How to Evaluate If Your Regular Vet’s After-Hours Service Is Sufficient
To determine if your regular vet’s after-hours service is sufficient, first call their line during an emergency and note who answers. A sufficient service provides a live triage nurse, not just a recorded message, and can connect you to a veterinarian on call within 15 minutes. Verify whether they handle your pet’s specific condition—e.g., if your pet has a cardiac issue, confirm they can run ECG and manage critical monitoring overnight. Assess transfer protocols: a sufficient service either admits the patient directly or has a pre-arranged handoff to a 24/7 facility.
- Ask if they have on-site staff overnight or only telemedicine advice.
- Request their escalation protocol if your pet’s condition deteriorates mid-night.
- Check if they stock emergency medications and oxygen for your pet’s size.
If they cannot guarantee continuous, hands-on care for your specific diagnosis, they fail the sufficiency test. Coverage depth—not simply availability—determines true adequacy.
Financial Preparedness and Stress Management During a Pet Health Crisis
When a pet emergency strikes, the dual shock of medical trauma and looming bills can paralyze even the most composed owner. Instead of reacting in panic, build a dedicated savings buffer—even $50 monthly—so you’re not swiping a credit card at 2 AM. Simultaneously, pre-decide your treatment ceiling: knowing your financial limit *before* the crisis removes agonizing in-the-moment guilt. During the chaos, focus on controlled breathing and one task at a time (call the vet, then the bank), because anxiety spikes when you feel helpless. Ask the clinic for a payment plan or care-credit application *while waiting*, not after discharge. This proactive split—**financial preparedness for pet emergencies** and deliberate stress management—keeps your decision-making sharp, your bond intact, and your wallet from dictating your pet’s fate.
Medical Payment Options: Insurance, Credit Plans, and Payment Agreements Explained
When a pet emergency hits, figuring out how to pay is half the battle. **Medical payment options for pet emergencies** usually come down to insurance, credit plans, or a payment agreement. Pet insurance reimburses you after you submit the invoice, so you’ll still need upfront cash or a card. Credit plans like CareCredit offer short-term, interest-free financing if you pay within a set period—just confirm your vet accepts them before you panic. Many clinics also offer in-house payment agreements, letting you split the bill into smaller installments, sometimes with a small fee. Ask about all three before treatment starts, not after.
**Q: What if I don’t have insurance or a credit plan?**
A: Just ask the front desk about a payment agreement—most vets would rather work out a monthly plan than delay critical care, so be honest about your budget.
Staying Calm and Communicating Effectively with ER Staff Under Pressure
When your pet is crashing and the ER is chaos, your job is to be the calm, clear voice in the room. Take one deep breath before you speak, and lead with the most urgent fact: “He collapsed five minutes ago” or “She can’t breathe.” Clear, concise communication with ER staff means answering their questions directly, even if you’re shaken—skip the long backstory and stick to what changed and when. If you don’t understand a term or cost estimate, say, “Can you explain that simply?” It’s okay to pause, gather your thoughts, and ask them to repeat instructions. Your steady tone helps them triage faster and keeps you from freezing up when they need your consent for lifesaving care.
Post-Stabilization Care: What to Expect in the First 24 Hours After an Emergency Visit
The first 24 hours after emergency discharge hinge on vigilant observation. Your pet will likely be lethargic and may refuse food; offer small water amounts first to gauge tolerance. Administer all prescribed medications exactly on schedule, as missed doses can trigger relapse. Monitor surgical incisions or bandages for swelling, oozing, or excessive licking. Expect to restrict activity completely—no stairs, jumping, or walks beyond brief, leashed bathroom breaks. Post-stabilization care requires structured reassessment: check temperature, gum color, and respiratory rate every four hours. Follow-up calls to the emergency vet are standard; document any vomiting, diarrhea, or unusual whining. Immediate re-evaluation is needed if your pet collapses, has pale gums, or shows unrelenting pain. Prepare a quiet recovery zone with easy access to bedding and a litter box nearby.
- Record baseline vital signs before leaving the clinic.
- Set phone alarms for each medication dose.
- Photograph the wound site and compare every 6 hours.
- Withhold food for 12 hours unless told otherwise.
- Contact the vet for any fever above 103°F.